Year 6 learning – week beginning 22nd June 2020
If you are still working from home, please do make sure that you are sending us your work on Class Dojo. We love hearing from you so please stay in contact regularly.
English
This week, our English is going to be based on our Geography topic of The Lake District. We are going to be creating a travel guide for those wishing to visit.

Day 1 – L.O. I can identify WMG travel guide.
Read examples and identify common features. Create a mind map of WMG travel guide. Split the features into structural and grammatical.
Example 2 – look at the Scarborough, Whitby and Filey features.
Day 2 – L.O. I can research and plan a travel guide using condensed notes.
Think back to our Whitby travel guides. What sections did we think your reader wanted to know more about? Use the template to structure your notes into more of a plan. Fill in the key vocabulary section, once completed. Think about impressive and persuasive vocabulary.
Lesson 2 – Researching and planning
Day 3 – L.O. I can write and edit my travel guide.
Use the plan, and our key features, to write your travel guide. Remember to use the Year 6 expectations.
Day 4 – L.O. I can publish my travel guide.
In neat, create an effective and eye- catching final draft of your travel guide. You may want to do this in poster or leaflet form.
Day 5 – L.O. I can independently write a travel guide.
Using the key features that we have learnt about this week, we would like for you to choose your dream destination and create a travel guide. It could be a place that you have previously visited, or somewhere that you have always wanted to visit. Remember to use the Year 6 expectations throughout your writing.
SPAG
This week, we shall be revisiting modal verbs and looking at persuasive language to help us when we our writing our travel guides to the Lake District.
Persuasive language – Powerpoint
Persuasive language – Worksheet
Geography

This week, we would like for you to create a case study about the Lake District. Watch the documentary below and make notes using the sheet beneath the video.
Case study – The Lake District
Maths
Lesson 2 – Area of a triangle (3)
Lesson 3 – Area of a parallelogram
Answers from last week:
Lesson 1 Answers – Fractions to percentages 2019
Lesson 2 Answers – Equivalent FDP 2019
Lesson 3 Answers – Order FDP 2019
Lesson 4 Answers – Percentage of an amount (2) 2019
Art
This week, we would like for you to have a focus on how and why we use complementary colours. Please have a look at the colour theory below and then create your own monster artwork (as shown below) based on the complementary colours. Remember to sketch it out first! You can use colouring pencils, paints, crayons, chalk or felt tips to create your work. We would love them to be sent to us on Class Dojo! (Why don’t you include your Dojo monster as one of the 4?)

From BBC Bitesize: Complementary colours
Complementary colours sit across from each other on the colour wheel.
These are often referred to as opposite colours and even contrasting colours. Don’t be confused by the three different names, they all mean the same thing.

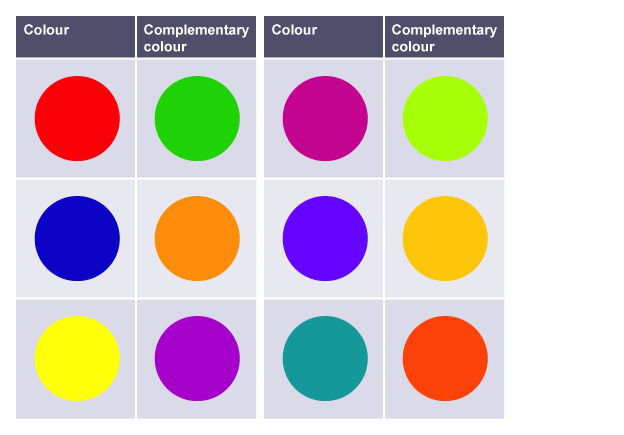
When complementary colours are placed next to each other, a very strong contrast is created. The colours appear more vivid and brighter. Some people say these colours clash when used next to each other and create very visually stimulating artwork. The complementary colours are:
- Green and red
- Orange and blue
- Yellow and purple
- Yellow-green and red-purple
- Yellow-orange and blue-purple
- Red-orange and blue-green
In Van Gogh’s Self portrait (1889), the blue of his shirt matches the background colour.
The blue complements the bright orange of the beard and hair and the greenish colour of Van Gogh’s face.
The painting palette and brushes are similar colours to the artist’s skin. There are patches of orange, green and pink paint on the palette. These make a visual link between the artist and his work that stands out against his surroundings.

Science
Which organisms lived during each era of time?
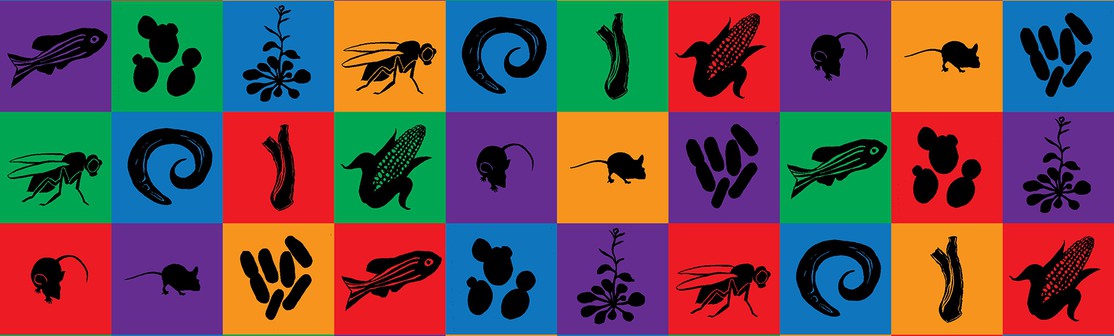
In this lesson, we will learn what the fossil record has taught us about the history of organisms that have existed on our planet. We will learn what a geologist is and what they can tell us about the organisms that have lived during each geological era of time. For this lesson you will need a piece of paper, a pencil and a ruler.
History
LO: To investigate and interpret the past.
Success Criteria: I can make deductions about artefacts from the Benin Kingdom
Key Question: What can we learn about Benin society from images and artefacts that have survived?
Starter
Run through key vocabulary, then show children image on slide 3, which they first saw in the last lesson. Give each child an image.
Task 1: Play Fastest Finger First – pupils take it in turns in their pairs to find something in the picture that they think tells us a fact about 11th century Benin.
Task 2: Now ask your child to come up with their top 5 deductions from this artist’s illustration. You may like to use the animations on the slide to draw attention to the most significant. The sort of things you might expect them to say might include:
1 Oba’s palace
2 One of the Oba’s important officials
3 A sun-shade for important people
4 The Oba
5 Leopards. These show that the Oba was powerful and strong
6 Rattle stick
7 Blowhorn
8 Villagers watching the procession
Input and Development
Next, ask the question, How did the artist know what to draw? Ask the pupils to think about the sorts of evidence an historian covering this period might use. As a gentle way into this demanding, but important question, ask pupils to consider the wealth of evidence available to historians in the future who might want to study Nigerian society of today. This will get them talking freely. Now return to the original question.
Task 3: Listed on Sources for the Artist sheet are 10 possible sources. Which do they think would have been available to historians studying the 11th century Benin? Ask your child to complete the list but ask the more able to consider which would have been most useful. Rank them 1-5 the most useful being 5. Discuss their ideas using slide 3 to help. Now tie the your child’s thinking on evidence to a more physical image. How did the artist know about each of the features numbered on slide 3?
Slide 5 and 6 helpfully shows some examples: a photograph of a figure blowing a horn; a bronze plaque of an Oba; a model of a leopard. Slide 7 shows a Dutch engraving from the 17th century. Can your child see the ways in which the modern artist has used its detail?
Task 4: Now it is time to play Call my Bluff, the history version. Show your child four mystery objects singly on slides 9, 10, 11, and 12 and then as a composite slide 13. Ask your child to come up with a possible plausible identification and explanation of use for the object that you have chosen. This presents a wonderful opportunity to develop pupils’ persuasive sentences. Pupils will benefit from you having modelled this. Three objects they are given are sufficiently similar to things they might have seen in the world around them today to enable them to make an educated guess.
Image 4 is designed to be more obscure, offering greater challenge to the more able. Ask your child to write their explanation on a sticky note, and collect these in. Discretely, add the REAL explanation to the pile for each object.
For each image, read out all the suggested explanations, including the correct one. You can then use slides 16-20 to give an explanation of each item (horn, altar bell, armlet and rattle staff).
Notes on each object are included in the lesson folder for further information.
Task 5: Ask your child to draw a museum exhibit showcasing these four objects, writing a quality caption underneath, using the stem phrase. This object is… It comes from (place and time). You can see the detail such as…It tells us that…
NB: Sketching the objects may seem like a redundant task when you could print out the images, but it’s actually an excellent activity during object work since it requires the children to look much more closely at each artefact, observing the details which are going to give them the clues they need to make deductions.
Plenary
Which object do you think is the most interesting?
Which object tells you the most about the Benin Empire?
Resources
Week 3 – learning from artefacts – powerpoint
PSHE
Friendships – establishing and maintaining

Using the sheet below, list was qualities you look for when making friends. Then narrow it down to what your most important qualities are:
Please read the scenario and then answer the question cards:
_________________
Windrush Day

Did you know that the 22nd June is known as Windrush Day? Find out more here.
What is the Windrush Generation? Check out this newsround link to find out more.
Task: Create a poster and/or leaflet about the information you have learnt about the Windrush Generation from the links above.